
I've been working on 7 more Vintage Home Decor Tags for 2 great ladies, Jeri-Jo & Ivy. The techniques will be featured on Treasured Memories Inspiration Blog - Technique Tuesdays starting January 29.
Today I am showcasing a tag created with a Marbled Metallic Distress Stain background. This is a fantastic technique & there are several cards & tags on the Internet using this marbled technique as well as Tim Holtz's blueprint stamps because they are soooo beautiful. Have a look!

 - First, apply 6 daubs of "Antiqued Bronze" & 6 daubs of "Tarnished Brass" Distress Stain in 2 areas side by side on a craft mat; sprinkle water droplets on stains; swirl tag through water stain mixture until you are happy with the colours; add more stains & water droplets to the craft mat if needed & repeat --- this is a MARBLED METALLIC Technique; (sorry, next time I will photograph the actual technique for you to see, prior to adding things to it)
- to prevent tag from curling, I swirl tag in marbled mixture on both sides
- DRY tag with a heat tool
- Stamp alphabet background stamp with black archival ink over entire tag
- Stamp ink spots with black archival ink randomly over tag
- ink edges of tag with Walnut Distress Ink; coat edges with Embossing Ink & UTEE then heat set (twice)
- Apply 2 rows of tissue tape along top & bottom of tag
- Stamp the word "Artist" onto ivory cardstock with black archival ink; tear around the word & ink edges with Walnut Distress Ink; coat with Embossing Ink & UTEE then heat set (twice); attach to bottom of tag with pop-dots
 - Stamp Dragonfly blueprint stamp with black archival ink on watercolour paper; tear around the image; Rub "Tarnished Brass" Distress Stain dauber along 1 torn edge then IMMEDIATELY dip your finger into water & smear along edge to blend (repeat to all 4 edges separately); ink torn edges with Walnut Distress Ink; coat torn edges with Embossing Ink & UTEE then heat set
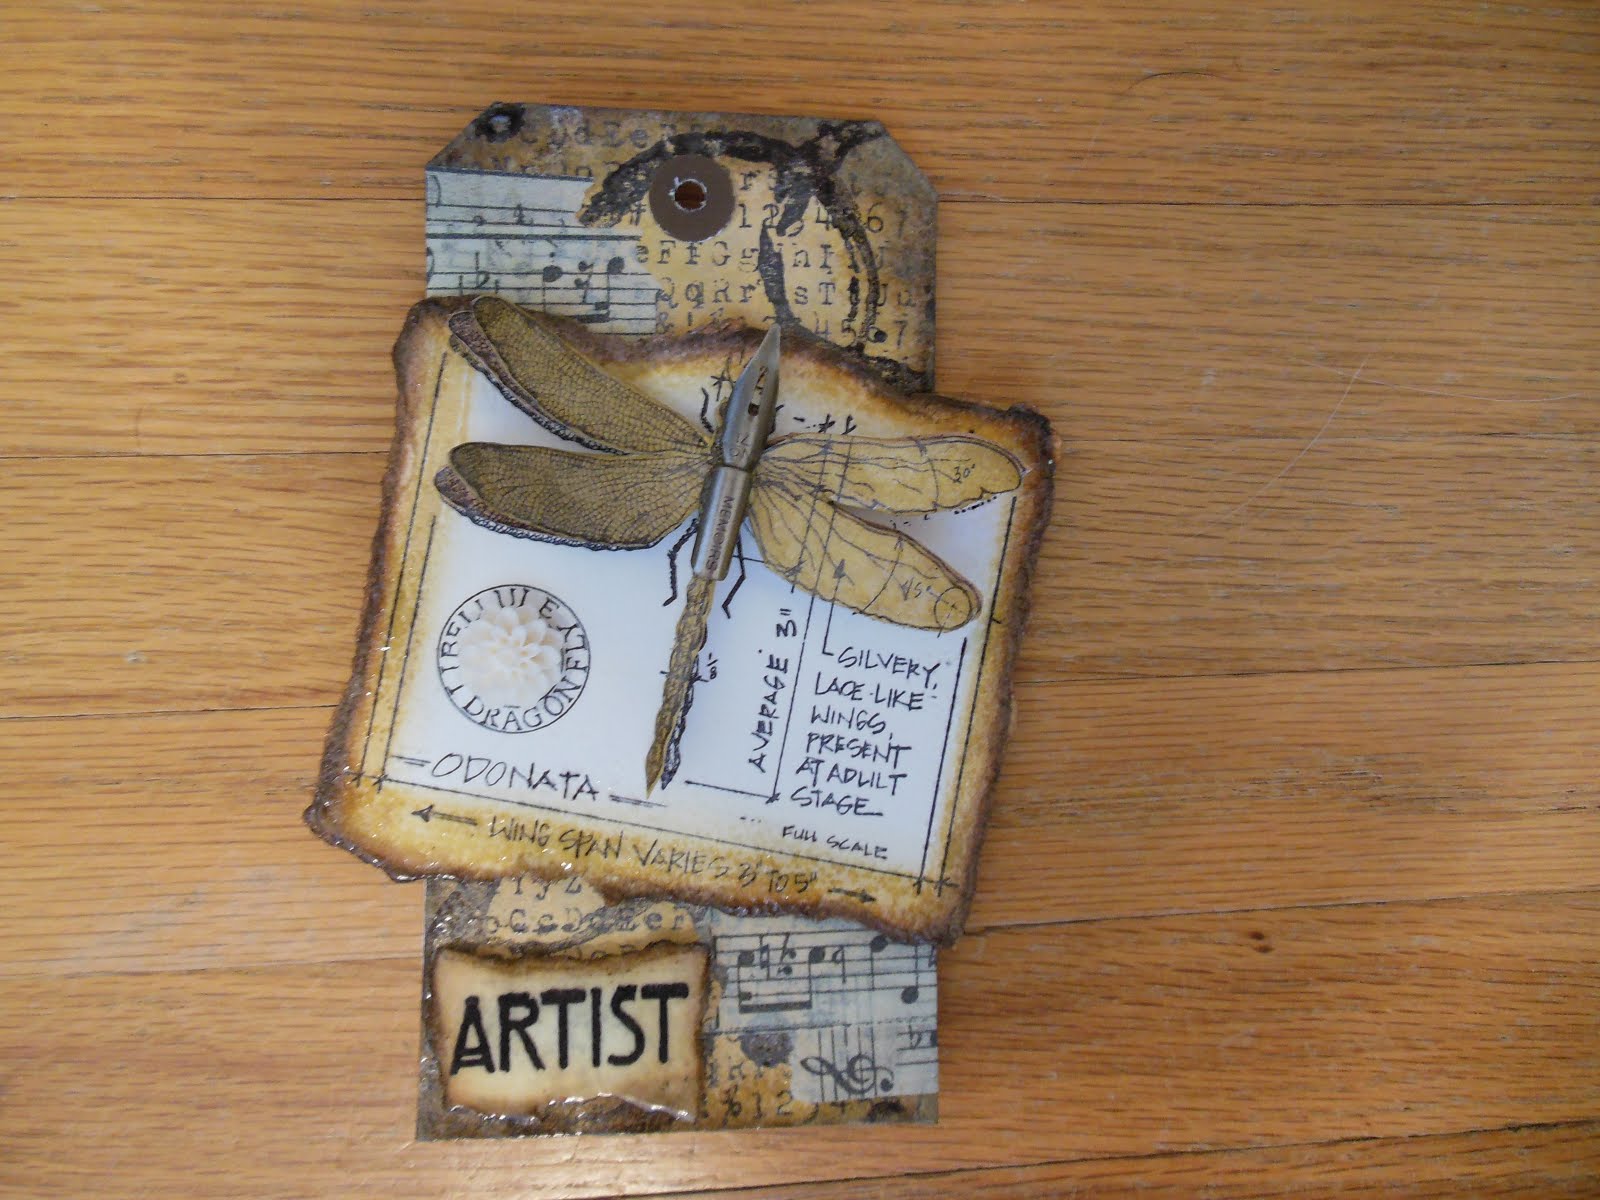 - Attach pop-dots to back of Dragonfly image & centre between tissue tape on tag
 - Stamp 2 Dragonfly blueprint images with black archival ink on ivory cardstock; Rub "Antiqued Bronze" Distress Stain on 1 set of wings & "Tarnished Brass" Distress Stain on the 2nd set of wings & body; fussy cut around Bronze wings only; fussy cut around entire Brass Dragonfly wings & body; coat Bronze wings & Brass Dragonfly with Embossing Ink & UTEE then heat set (twice); apply pop-dots to Bronze wings & attach to Dragonfly on tag; apply pop-dots to Brass Dragonfly & attach to Bronze wings on tag
 - glue pen nib to body of Dragonfly with Fabri-tac; glue white flower to centre of "Libellule Dragonfly" circle on tag with Fabri-tac (see both photos above for flower)
I absolutely love the Marbled Metallic background & applying UTEE to the edges greatly highlights the tag!
Try this Marbled Metallic Technique & let me know what you think.
Have fun creating!

No comments:
Post a Comment